


Table of Contents
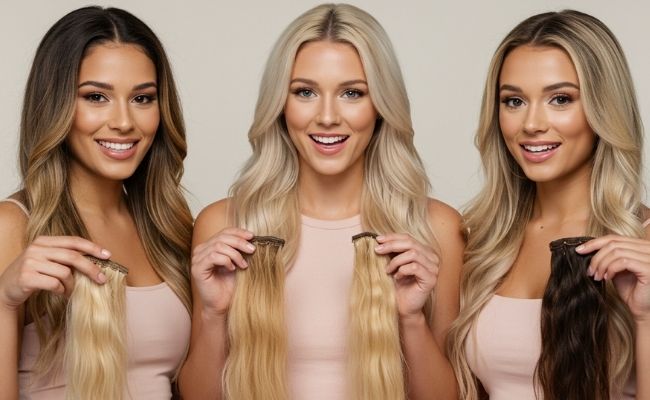
If you are unsure about how to choose the right and suitable pre-bonded hair extensions for yourself, understanding the advantages and differences between K-Tip hair extensions and I-Tip hair extensions is essential. This article will help you better understand them, allowing you to make the right choice for your hair.
What Are K-Tip Hair Extensions?
K-Tip hair extensions, also known as keratin hair extensions or fusion hair extensions, use high-quality Italian keratin adhesive to bond with natural hair. They are an upgraded version of U-Tip hair extensions, achieving seamless integration with natural hair by heating the keratin tips. K-Tip extensions also incorporate the advantages of flat-tip hair extensions and can be installed using cold fusion techniques, providing more flexibility in the installation process. This allows for increased length and volume while creating a natural, inconspicuous look.
Another significant advantage of K-Tip extensions is that they require minimal maintenance after application, making them ideal for busy women seeking low-maintenance solutions. They are a perfect choice for those looking for semi-permanent hair extensions.
Advantages and Disadvantages of K-Tip Extensions
K-Tip extensions are the latest and most popular semi-permanent hair extensions, boasting several advantages that make them a top choice among pre-bonded hair extensions:
Advantages of K-Tip Extensions:
-
Versatile Application: K-Tip extensions can be installed using two methods—cold fusion and hot fusion—allowing for flexible installation options.
-
Natural Integration: The keratin tips blend seamlessly with your natural hair color, and each extension is individually installed, ensuring a flawless natural look.
-
Durability: Made from high-quality Italian keratin, K-Tip extensions are long-lasting and provide semi-permanent results, with lower maintenance costs compared to other extension types.
-
Styling Flexibility: Made from 100% human hair, K-Tip extensions can be curled, dyed, and styled in various ways. However, it is essential to use heat protectant products to maintain their quality.
Disadvantages of K-Tip Extensions:
While these advantages make K-Tip extensions popular among women, there are some considerations to keep in mind:
-
Professional Installation Required: K-Tip extensions must be installed and removed by a professional stylist, typically taking several hours to complete.
-
Higher Initial Cost: The cost of initial installation can be relatively high, which is an important factor to consider before choosing extensions.


What Are I-Tip Hair Extensions?
I-Tip hair extensions, also known as cold fusion hair extensions, are installed using micro rings without the need for heat or adhesive. This method allows for 360-degree movement, minimizing damage to natural hair. They are highly favored for their natural appearance, silky texture, and comfortable wearing experience.
Advantages and Disadvantages of I-Tip Extensions
Advantages of I-Tip Extensions:
-
No Heat Damage: The cold fusion application method requires no heat or adhesives, resulting in minimal damage to natural hair and greater longevity.
-
Natural Integration: I-Tip extensions are installed strand by strand, seamlessly blending with your natural hair texture.
-
Reuseable Installation: The beaded installation is reusable and easy to maintain, making it a cost-effective option.
-
Styling Flexibility: Made from 100% human hair, I-Tip extensions can be curled, dyed, and styled in various ways. However, it's essential to use heat protectants to maintain their integrity.
Disadvantages of I-Tip Extensions:
-
Long Installation Time: Installing I-Tip extensions can take a significant amount of time, similar to K-Tip extensions.
-
Risk of Slippage: If too few strands of natural hair are used during installation or the beads are not tightened adequately, extensions may slip out.
-
Regular Maintenance Required: As natural hair grows, periodic maintenance is necessary to tighten the beads.
-
Potential Discomfort: If installed too close to the scalp, there may be some discomfort; therefore, it's advisable to seek professional assistance for installation.
In summary, while I-Tip extensions offer several benefits, it's important to consider these disadvantages before choosing them for your hair needs.


K-Tips vs. I-Tips
K-Tip and I-Tip extensions are both installed strand by strand, achieving a natural blend with your hair. These semi-permanent extensions are a cost-effective choice compared to weft hair extensions and tape-in hair extensions, as they do not require frequent replacements or repositioning.
Before selecting the right extensions, it’s essential to understand the differences between K-Tips and I-Tips. Considering various factors helps determine which option best meets your needs for a satisfying hair extension experience.
Different Hair Types and Lifestyles
K-Tip hair extensions are suitable for various hair types, particularly for thicker hair. Because they utilize a keratin bond for installation, they can support the weight of more extensions, making them ideal for those with dense hair. In contrast, I-Tip hair extensions use bead installation, which causes minimal damage to natural hair and is better suited for individuals with fine or thin hair.
Since I-Tip hair extensions have lower maintenance costs and can be reused, they tend to be more popular among those who frequently engage in sports or swimming. On the other hand, K-Tip hair extensions are a better choice for busy individuals who need a low-maintenance option.
Durability and Longevity
K-Tip hair extensions are more durable and tend to last longer because they use keratin bonds to securely attach to natural hair. While I-Tip hair extensions are also durable and can be reused, they require repositioning every 3-4 months due to natural hair growth.
Maintenance Methods
When maintaining K-Tip hair extensions, it's important to avoid applying oily substances like conditioners and hair oils to the keratin tips, as this can reduce their stickiness and lead to slippage. On the other hand, I-Tip extensions require regular checks to ensure that the beads remain secure and properly fastened.
| K tips | I tips | |
| Installation method | Cold fusion & hot fusion | Bead installation |
| Suitable hair type | Various hair types, especially thick hair | Various hair types, especially fine or thin hair |
| Lifestyle | Low-maintenance for busy lifestyles | Active lifestyles such as sports and swimming |
| Duration | Lasts longer | Requires repositioning every 3-4 months and can be reused |
How to Apply K-Tip Hair Extensions?
Hot Fusion Installation:
- Wash the hair and blow-dry it until completely dry. Avoid products like shampoo and serum that could affect the bonding process.
- Section the hair into several parts and secure them with sectioning clips.
- Take a small, clean, and smooth section of natural hair that is roughly the same thickness as the extension.
- Place the keratin tip near the hair root, about 1 centimeter away from the scalp, to ensure comfort and allow for natural movement. (Remember to use a heat protection pad for safety.)
- Use a heating tool to soften the keratin.
- Use your fingers or pliers to roll the softened keratin into a cylindrical shape and wrap it around the hair.
- Repeat the above steps, taking care to avoid washing or pulling on the keratin bonds for the next 24 hours.

Cold Fusion Installation:
- Cut along the center line of the K-Tip extension to split it into two halves.
- Select a small amount of hair and thread it through a micro-bead.
- Pull the hair through the bead and place the bead about ½ inch away from the scalp.
- Insert the K-Tip extension into the bead and use pliers to securely clamp the micro-bead tightly around the hair and extension to hold them together.
- Repeat the above steps.
How to Apply I-Tip Hair Extensions?

-
Separate the Hair:
Use your fingers or a tail comb to section the hair for placing the extensions. -
Prepare the Pull Tool with Micro Rings:
Thread the micro ring onto the hook part of the pull tool. -
Determine the Installation Position:
Use the hook to grab a section of natural hair. With your other hand, prepare to thread the hair through the micro ring. -
Thread the Hair through the Micro Ring:
Hold the micro ring with one hand and the pull tool with the other hand, then thread the natural hair through the micro ring. -
Insert the Professional Extension:
After pulling the natural hair through the micro ring, place the professional extension between the micro ring and the natural hair. -
Clamp the Micro Ring:
Slide the micro ring about half an inch away from the scalp. Position the micro ring and the hair in place and securely clamp the micro ring using extension tools. -
Reapply the Professional Extensions to Desired Positions:
Repeat the above steps to apply the professional extensions in other sections until the desired look is achieved.
In summary, the choice between K-Tips and I-Tips should be evaluated based on various factors including personal needs, hair type, and preferences. Through this article, we aim to provide a deeper understanding of both options to help you make the most suitable hair extension choice.What's the wait? Come to YoungSee and choose the perfect pre-bonded hair extensions now!
Learn More:
All You Need to Know About Pre-Bonded Extensions
All you need to know about I tip hair extensions
All You Need to Know about K Tip Hair Extensions
The difference between Virgin I tip hair, U tip hair and Flat tip hair
